What’s for Supper Weekend Bread Special 2: breakfast milk rolls
Our bread making classes remain the most rewarding classes to run for me and my team of Leiths and Cordon Bleu trained teaching chefs. For so many of our attending guests, they are life changing. The Beginners Bread class was the very first class that I designed back in 2009, out of our now 40 odd categories of classes. As an artisan baker, my heart and soul is in bread making in a way which it simply isn’t when it comes to cakes or desserts.
Having freshly baked bread for breakfast is such a joy. These little milk rolls are quick to mix and bake, and require the usual hour or so to rise. When milk and perhaps a little butter is added to a dough, rather than just water and perhaps a little oil, the resulting bread will be light, soft and fluffy. No crust, just pillowy loveliness.
My freezer is pretty full at the moment, so I bake in small batches. That way all rolls can be enjoyed while still slightly warm, with lashings of butter and I also very much enjoy starting my day with baking. You can easily double the quantities. Halving what is already a small batch would not work so well.
6 rolls
20g fresh yeast or 5g quick action dry yeast (just under one full sachet)
30g melted butter
175ml milk
1 heaped tablespoon caster sugar
1 teaspoon sea salt
300g flour – strong, plain or a mix of the two. Using 1/3 rye, but no more, works really well.
If you are using quick action yeast it can go straight into the flour dry, as long as your liquid is a little warmer than tepid.
Start by melting the butter – in a saucepan, the old fashioned way, or in a microwave.
Add the milk, stir/heat until just a tad warmer than you are. About 38C.
Place the yeast, fresh or dried, in a mixing bowl.
Pour over the warmish buttery milk. Stir to dissolve the yeast as you do so.
Add sugar and salt, followed by the flour.
Stir in, and when all the flour is added, sprinkle a little more on the dough in the bowl, put your wooden spoon away, stick your hand in, and knead. Turn out on a very sparesely floured work surface and knead and fold the dough. Knead using the base of your palm, pushing dough away from you to stretch it, then fold it back on itself. Repeat.
The stretching creates gluten, the folding helps to trap air for the yeast to work in.
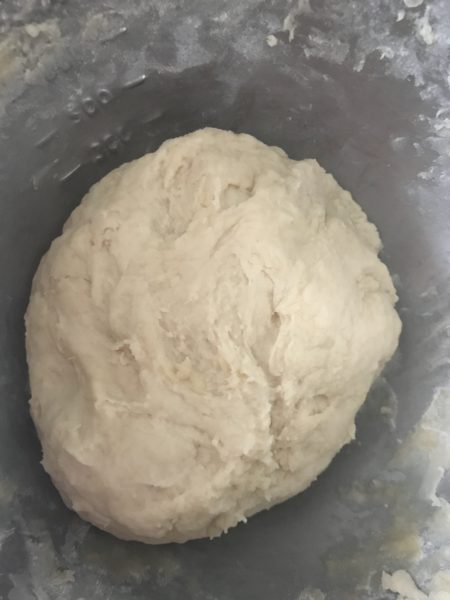
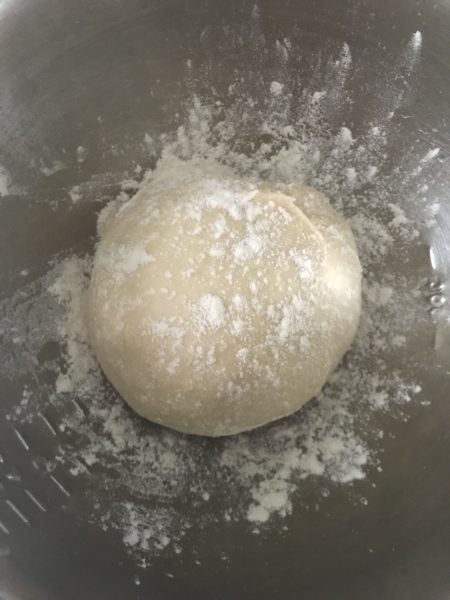
Knead like this for 4-5 minutes. You will see how the dough changes from “ropey” and ragged, as above, to looking glossy and smooth. To find out if you have kneaded enough to create the gluten needed for good bread, do a “gluten window” test as shown in the little clip below. You should be able to stretch a thin membrane without the dough breaking. If it breaks up, knead for another 30-60 seconds – it can be that quick. Gluten is made by mixing flour and a liquid and then stretching and manipulating it. Long molecular gluten strands to give the bread its lovely texture are created and that’s what you want.
Rinse out the bowl, or grab a new clean one, sprinkle a little flour in the base and drop the dough in. Cover with a clean tea towel or some cling film. Leave for about an hour to rise, in a sunny spot on your work top. The dough should now look beautifully domed as below.
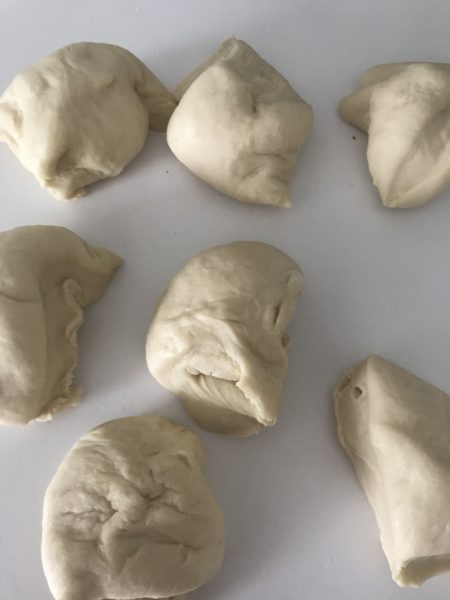
Tip out the dough. It will feel very light and tender. Give it a few gentle folds, then shape again and cut into 6 or 7 equal pieces. Shape each into roll.
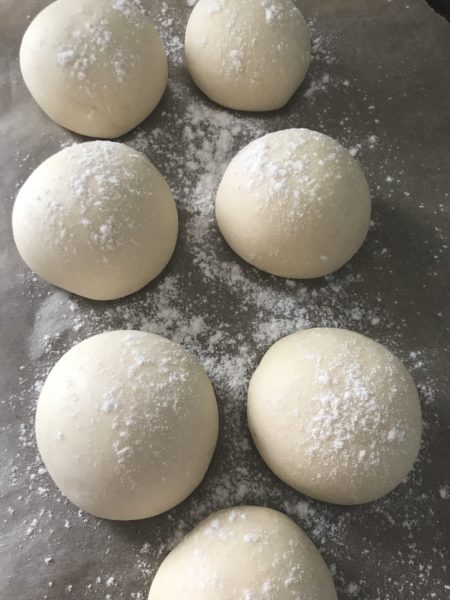
Switch your oven to 210C. Dust your rolls with a little flour, or brush with a little milk.
Leave them somewhere warmish, say in a sunny spot in your kitchen, no warmer, to prove while your oven comes up to temperature.
Bake in the middle of the oven for about 13-14 minutes.
Baked bread will sound hollow when you give it a little tap on the bottom, as it were.
Leave to cool down a little before devouring but don’t leave for long as fresh bread starts to go stale the minute it comes out of the oven. I like topping my rolls with some nice, nutty hard cheese like Gruyère and a dollop of black currant jam, the Scandi way. Sounds odd? Try it.