What’s for Supper Weekend Bread Special 1: making a sour dough starter
Our bread making classes remain the most rewarding classes to run for me and my team of Leiths and Cordon Bleu trained teaching chefs. For so many of our attending guests, they are life changing. The Beginners Bread class was the very first class that I designed back in 2009, out of our now 40 odd categories of classes. As an artisan baker, my heart and soul is in bread making in a way which it simply isn’t when it comes to cakes or desserts.
Quite a few of you have got in touch with questions relating to the lack of flour and keeping sour dough starters alive and well. Sour dough is, as those who bake it know, in a category of its own. Working with natural yeasts and ferments is so very different from baking bread with commercial yeast. But now is the time to try our hands at something different, and I thought I would create a post about how to create a sour dough starter.
A starter is made simply from strong organic flour and water, in more or less equal quantity. I usually work with a starter which consists of 90g flour to 100g water. We keep litres of it in our kitchen at the school but at home you probably don’t wan’t to store more than 500g. Organic flour is important to ensure that there are no chemicals inhibiting the natural yeast bacteria in the flour.
These were my pots of starter during the 3-day creating process earlier this week.
The images don’t convey the change in texture that you should expect, so here is a little film to show consistency
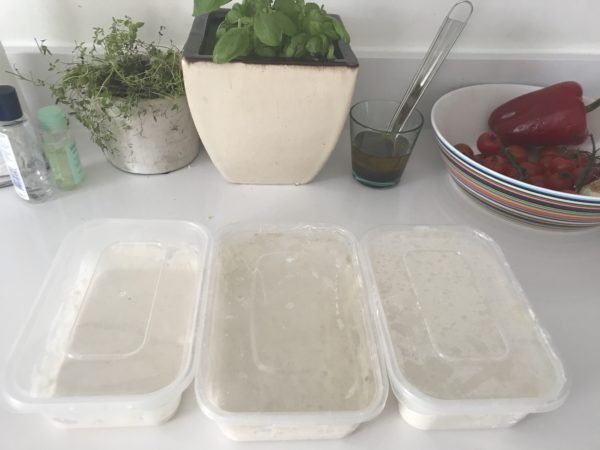
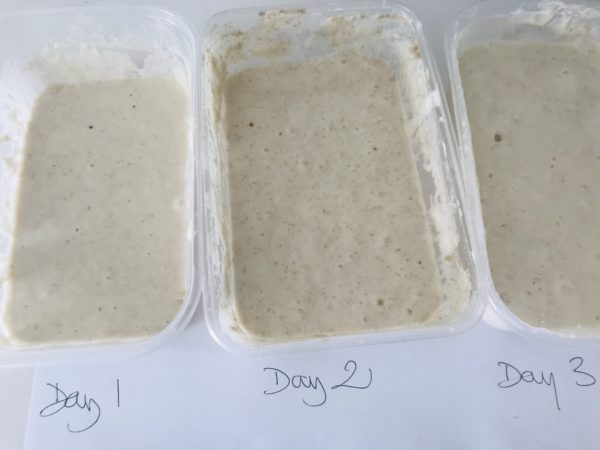
Day 1: 90g strong organic flour/100g water – creates a dense, flat gloop
Day 2: 90g strong organic flour/100g water – starting to develop air bubbles
Day 3: 90g strong organic flour/100g water – plenty of action, lots of air bubbles
Leave this on the kitchen work top – or outside, to capture local wild yeast spores in the air over the course of the 72 hours. To encourage yeast development when you first make a starter, you could add a few dried raisins or a little honey. Once the starter is healthy, it should be kept in the fridge. If left on the counter top in a warm kitchen, the fermentation will carry on and tip the balance of bacteria until it becomes a black, stinking mass. That requires emergency measures.
When I am getting ready to create a dough, I feed my starter again and leave it on my work top, in the warmth of my kitchen, to ensure it is at its most potent. Usually that will take about 90 minutes to 2 hours. This is what it should look like STARTER READY TO WORK WITH
If you have a starter already but have run out of strong and/or organic bread flour, you can feed your starter any flour, just to keep it alive and healthy. A plain flour won’t have the gluten content required for making a good, structural bread, but it will sustain your starter until you can get hold of strong flour. Non-organic flour will have very little natural yeast spores left in it but you can help it along by placing the starter outdoors. You can use rye, 00 flour, plain, wholemeal, seeded, brown, spelt – anything but self rising. I know it’s obvious but I will point it out anyway; self rising contains dry commercial yeast and it would kill off your wild ferment. A sour dough starter fed mainly on plain, or other less glutenous flours over a period of time can still be used to bake with. Try making milk rolls – recipe coming tomorrow – or enriched dough for cinnamon buns, hot cross buns etc where you are not aiming for a rustic loaf, but softer types of rolls and baked goods.
Oven proof….
February 21, 2017
Cookery School Dog Biscuits
June 4, 2016
Swedish Fennel and caraway seed soda bread
August 24, 2015
An apple a day . . .
November 4, 2013
